In the past, Heroku was the go-to choice for those seeking a free test server, but with their recent shift to paid services, finding alternatives for hosting Laravel test applications has become a challenge. Many available options either offer limited flexibility or are shared hosting platforms. However, in this article, I will introduce you to Render—a hosting platform that enables easy hosting of Laravel apps directly from your git repository.
Getting Started
The first thing you would need to do is to create a new Laravel Application. If you already have Laravel installed, all you need to do is to run
composer create-project laravel/laravel render-deploy
or run this if you have Laravel installed globally
laravel new render-deploy
Step 2: Add Docker and NGINX Configurations
Next, we would Dockerize our Laravel application based on Render's requirements, and add deploy scripts and NGINX configurations. Don't be scared if you don't have experience using docker, I would lead you each step along the way.
Firstly, On your root folder, create a .dockerignore file and copy the following lines into it
/node_modules
/public/hot
/public/storage
/storage/*.key
/vendor
.env
.phpunit.result.cache
Homestead.json
Homestead.yaml
npm-debug.log
yarn-error.log
This file works similarly to the usual git ignore files, it contains files and directories we don't want to include in our Docker Image. You can adjust it based on your needs.
Secondly, Create a Dockerfile on the root directory and copy the following into it
FROM richarvey/nginx-php-fpm:1.7.2

COPY . .

# Image config
ENV SKIP_COMPOSER 1
ENV WEBROOT /var/www/html/public
ENV PHP_ERRORS_STDERR 1
ENV RUN_SCRIPTS 1
ENV REAL_IP_HEADER 1

# Laravel config
ENV APP_ENV production
ENV APP_DEBUG false
ENV LOG_CHANNEL stderr

# Allow composer to run as root
ENV COMPOSER_ALLOW_SUPERUSER 1

CMD ["/start.sh"]
This file contains the configurations for your dockerImage. There is not so much you may need to adjust here except for the first line [this specifies the parent image] which determines the version of PHP and NGINX your docker container would be using. You should make sure the PHP version of your Docker Container matches the PHP version of your Laravel Application. If you want to use it to pull the latest parent images you can use FROM richarvey/nginx-php-fpm:latest as your parent image. You can check here for other parent image tags that suit you. Also, you may want to adjust some of the Environmental variables like APP_ENV and APP_DEBUG.
Thirdly, create a conf folder on the root directory and an nginx subfolder. Then, create an nginx-site.conf file in it and copy the following into it
server {
  # Render provisions and terminates SSL
  listen 80;

  # Make site accessible from http://localhost/
  server_name _;

  root /var/www/html/public;
  index index.html index.htm index.php;

  # Disable sendfile as per https://docs.vagrantup.com/v2/synced-folders/virtualbox.html
  sendfile off;

  # Add stdout logging
  error_log /dev/stdout info;
  access_log /dev/stdout;

  # block access to sensitive information about git
  location /.git {
    deny all;
    return 403;
  }

  add_header X-Frame-Options "SAMEORIGIN";
  add_header X-XSS-Protection "1; mode=block";
  add_header X-Content-Type-Options "nosniff";

  charset utf-8;

  location / {
      try_files $uri $uri/ /index.php?$query_string;
  }

  location = /favicon.ico { access_log off; log_not_found off; }
  location = /robots.txt  { access_log off; log_not_found off; }

  error_page 404 /index.php;

  location ~* \.(jpg|jpeg|gif|png|css|js|ico|webp|tiff|ttf|svg)$ {
    expires 5d;
  }

  location ~ \.php$ {
    fastcgi_split_path_info ^(.+\.php)(/.+)$;
    fastcgi_pass unix:/var/run/php-fpm.sock;
    fastcgi_index index.php;
    fastcgi_param SCRIPT_FILENAME $document_root$fastcgi_script_name;
    fastcgi_param SCRIPT_NAME $fastcgi_script_name;
    include fastcgi_params;
  }

  # deny access to . files
  location ~ /\. {
    log_not_found off;
    deny all;
  }

  location ~ /\.(?!well-known).* {
    deny all;
  }
}
Finally, create a scripts folder from the root directory and create a 00-laravel-deploy.sh file in it and copy the following into it
#!/usr/bin/env bash
echo "Running composer"
composer global require hirak/prestissimo
composer install --no-dev --working-dir=/var/www/html

echo "generating application key..."
php artisan key:generate --show

echo "Caching config..."
php artisan config:cache

echo "Caching routes..."
php artisan route:cache

echo "Running migrations..."
php artisan migrate --force
This is the deploy script for your Laravel application, you can add/remove commands you would like to run when your application is being deployed. For example, you could add php artisan db:seed to seed data to the database when your application is being deployed.
Your file structure should look like this:

Step 3: Deploy to GitHub & Connect Account to Render
Now that we are done setting up our project, you should deploy it to a Git repository. Sign up on Render and connect your GitHub account to Render.
Step 4: Create a new Service on Render
Once you have connected your GitHub account to Render, you can go ahead to create a new web service on Render.
Click on the New+ button on the Navbar and select Web Service.

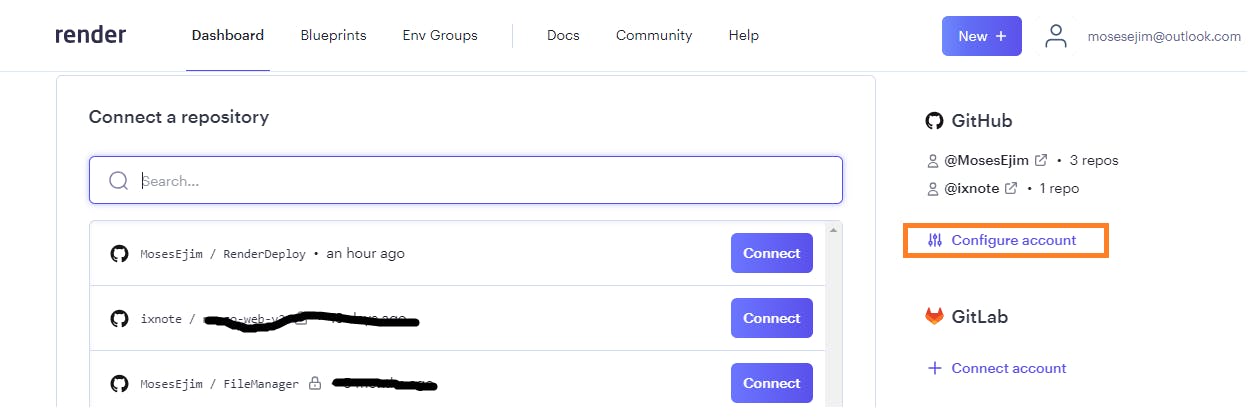
You should now see the list of all or some of the repositories on your GitHub account. If you can't find the repository you want to use, click on configure account as shown in the image below.

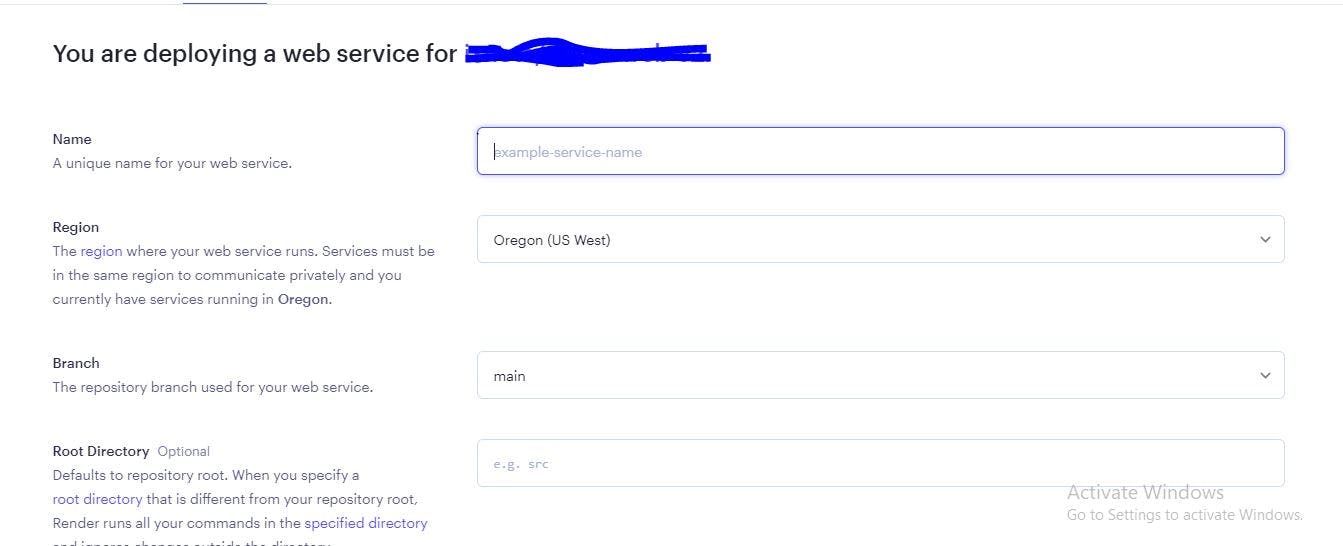
This would lead you to a GitHub page where you can select the repositories that Render has access to. Select the repository you want to deploy and click on connect. Enter your web service name and click on create web service.


Render would automatically start deploying your application.
Step 5: Add the Application key
While render is deploying your application, you would need to copy the application key generated by this command php artisan key:generate --show on the terminal.

Once you copy it, click on environment on the sidebar and add the APP_KEY environmental variable.

Once you are done adding the environmental variables, you can remove php artisan key:generate --show from the deploy script, so you don't generate a new app key anytime you make an update.
When deployment is complete, you should be able to access your application from the link generated by render as shown in the image below.

Step 6: Connect Your Database
Render also offers you a free PostgreSQL database Database. To create a new database, click on new+ and select PostgreSQL

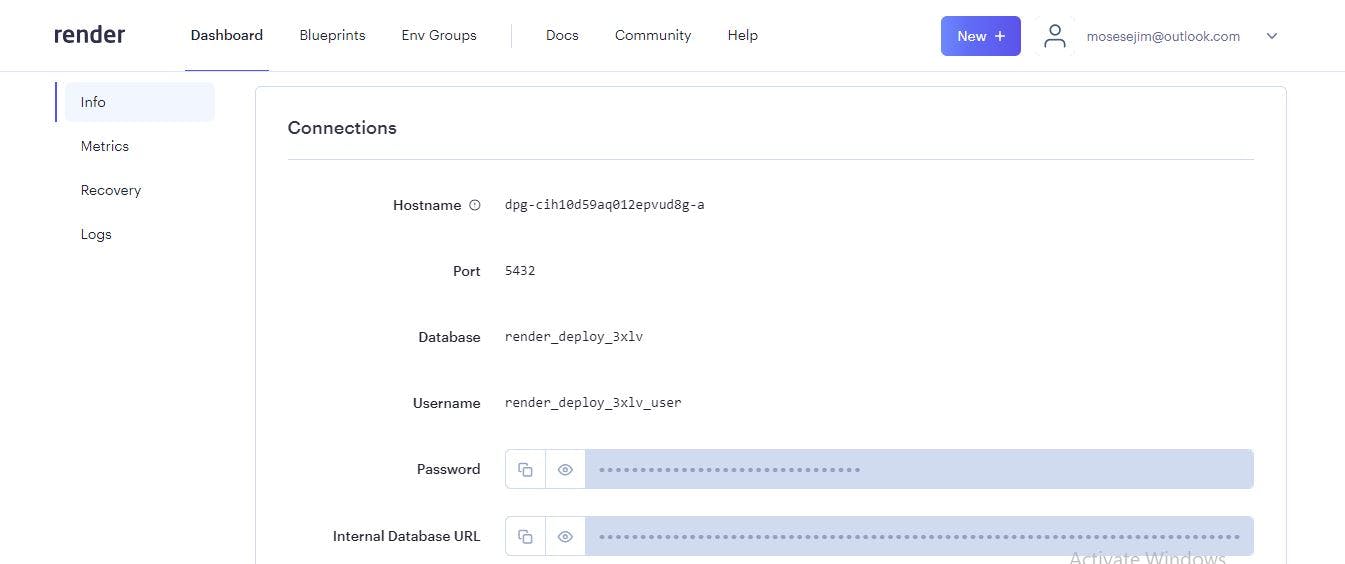
Enter the details and click on Create database. Render would create the database and provide you with a list of credentials you would need to add to your environmental variables.


The DB_CONNECTION should be pgsql and the DATABASE_URL should be the Internal Database URL generated by Render. You should also add the DB_HOST, DB_PORT, DB_DATABASE, DB_USERNAME, and DB_PASSWORD to the environmental variables. You can then redeploy and run your migrations.
Yeah, That's it. Your application should be ready. Leave a comment and follow me if this article is helpful.

